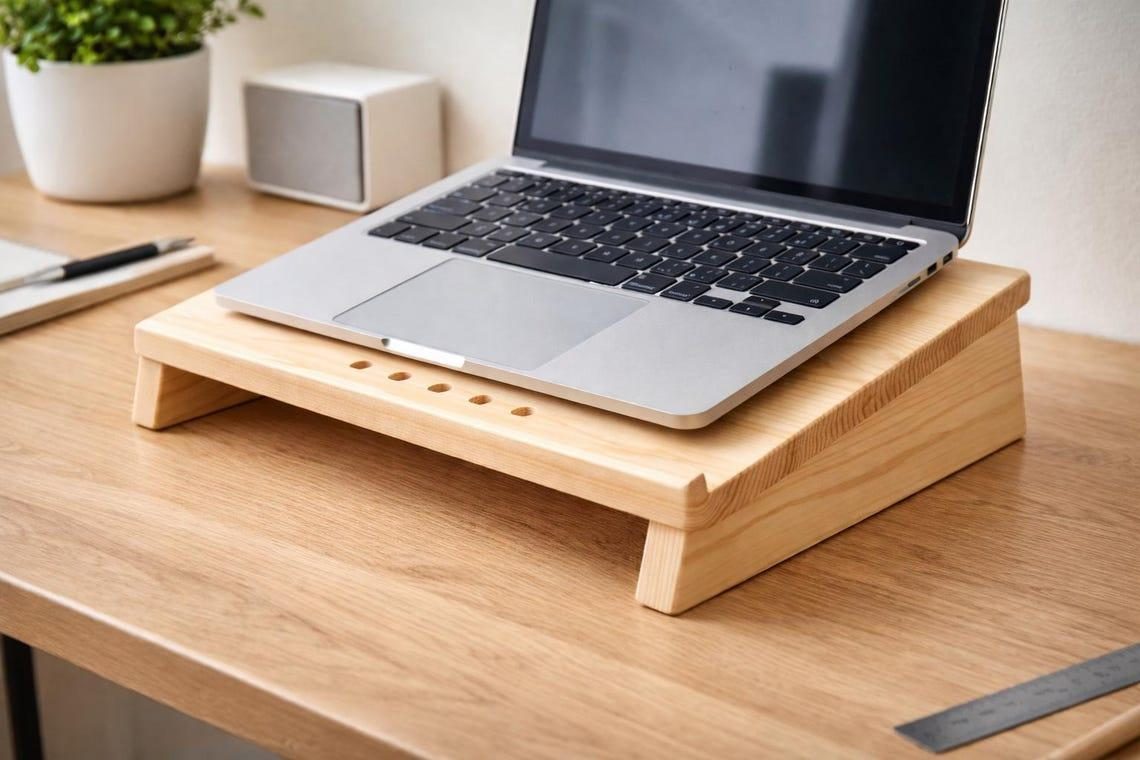


GIVE YOUR LAPTOP A MORE COMFORTABLE WORKING HEIGHT.
If you spend hours working on a laptop, you may find yourself leaning forward just to see the screen. A simple wooden laptop stand can raise your display, free up desk space underneath, and help create a more comfortable workstation.
This beginner-friendly project uses basic wood pieces and can be customized to fit your laptop.
WHAT YOU'LL NEED
- One sturdy plywood or pine board, around 18 mm thick
- Two matching wooden side supports
- A narrow wooden strip for the front retaining lip
- Wood glue
- Wood screws
- Four rubber or cork pads
- Sandpaper, medium and fine grit
- Measuring tape, pencil and square
- Saw and drill
- Wood stain, paint or clear wood finish
STEP-BY-STEP INSTRUCTIONS
- Measure your laptop
Measure the width and depth of your laptop. Make the top platform slightly wider and deeper than the device so it has enough room to sit securely. Leave space around the laptop's ventilation areas.
- Plan the height and angle
Decide how high you want the screen to sit. For a desktop setup, aim to position the screen so you can look forward without constantly bending your neck. The top of the screen should be around eye level, or slightly below it.
Remember that raising the laptop means you will need a separate keyboard and mouse for comfortable typing.
- Cut the platform
Mark your measurements on the wood and cut the top panel. Check that the edges are straight and that the platform is large enough to support the laptop without overhanging too much.
- Prepare the side supports
Cut two identical side panels. You can make them triangular or trapezoidal to create a gentle upward slope. Both supports must have matching angles and heights so the platform does not wobble.
- Attach the supports
Apply wood glue to the joining edges. Position the side supports underneath the platform, keeping them evenly spaced. Drill pilot holes before inserting screws to reduce the risk of splitting the wood.
- Add a front retaining lip
Attach a narrow strip along the lower front edge. This helps prevent the laptop from sliding forward when the stand is angled. Make sure the lip does not cover ports, vents or important controls.
- Sand and finish
Sand the entire stand, especially the corners and edges. Apply wood stain, paint or a clear protective finish. Let it dry completely before placing your laptop on it.
- Add non-slip protection
Attach rubber or cork pads underneath the supports. Test the stand on your actual desk and check that it remains stable when you gently use the keyboard.
DESIGNER TIP
Choose a simple natural wood finish for a clean office look. Keep the space underneath open so you can slide your external keyboard or small accessories beneath the stand when they are not in use.
IMPORTANT
A laptop stand does not replace an ergonomic chair or proper workstation setup. Keep your screen at a comfortable viewing height, use an external keyboard and mouse, and make sure the laptop has enough airflow.
Would you build this for your home office or your everyday desk?
Save this project for your next workspace upgrade.