DIY Jute Rope Mirror

Create a Beautiful Boho Wall Accent on a Budget
What Is It?
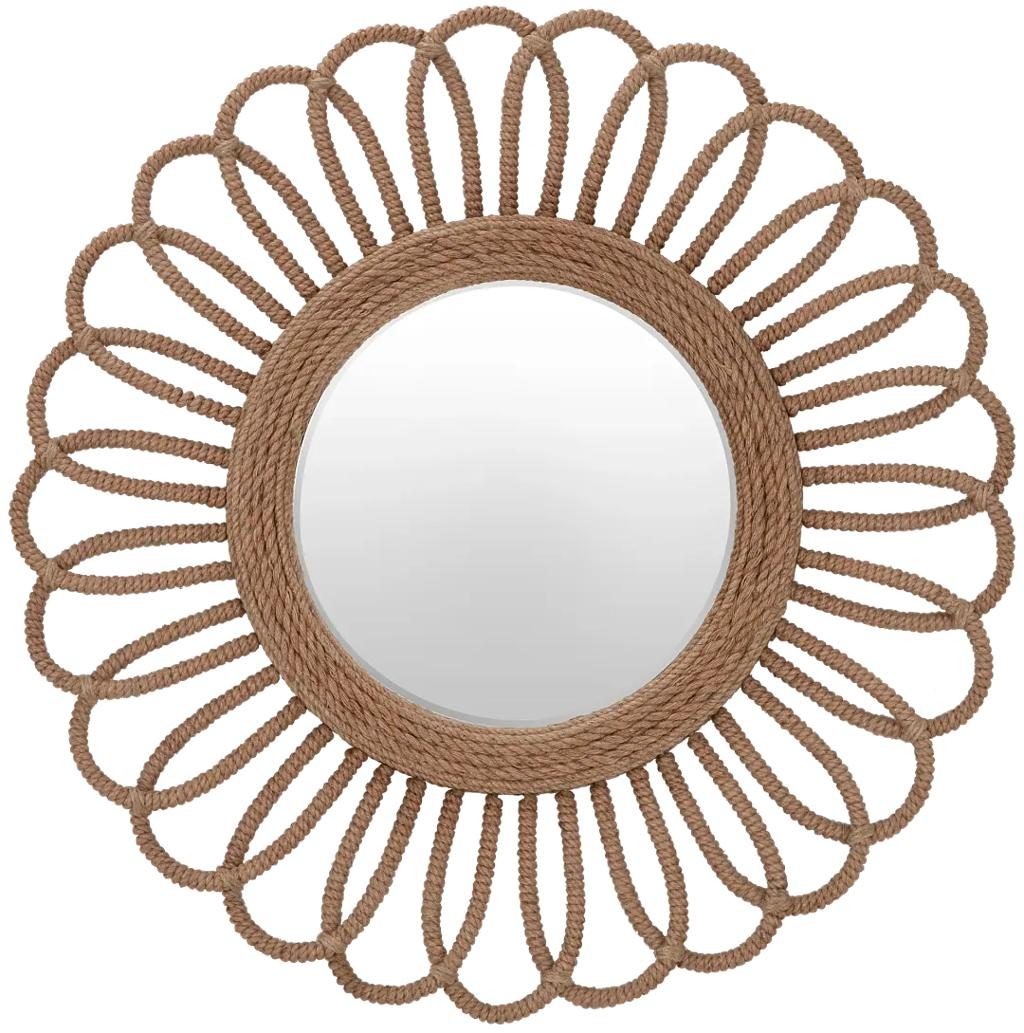
A DIY jute rope mirror is a decorative wall piece made by covering the outer frame of a round mirror with natural rope. The combination of reflective glass and textured jute creates a warm, rustic appearance that can make an ordinary mirror look like a custom home decor piece.
This design works beautifully in boho, coastal, farmhouse, and minimalist interiors. You can place it above an entryway console, in a bedroom, beside a dressing area, or as part of a decorative gallery wall.
The best part is that you can make it using an inexpensive round mirror, rope, and a few basic crafting supplies. You can also customize the thickness and color of the rope to match your interior style.
Materials You Will Need
- One round mirror with a flat frame or a small round craft mirror
- Natural jute rope or thick cotton rope
- Sturdy circular cardboard or plywood backing, if needed
- Hot glue gun and glue sticks
- Scissors or a suitable cutting tool
- Measuring tape or ruler
- Pencil
- Masking tape
- Hanging hardware suitable for the finished mirror's weight
How to Make It
1.) Prepare Your Mirror and Base
Choose a round mirror in your preferred size. If using a frameless mirror, cut a sturdy circular cardboard or plywood backing slightly larger than the mirror. Make sure the backing is strong enough to support the finished piece.
2.) Position the Mirror
Place the mirror in the center of the backing and mark its position. Secure it using an adhesive suitable for the mirror and backing materials. Follow the adhesive manufacturer's instructions and allow it to cure properly.
3.) Measure and Cut the Rope
Measure the circumference of the mirror's outer edge and estimate how much rope you will need. Cut a little extra to allow for trimming and adjustments. If you want a thicker border, prepare additional rope.
4.) Start Wrapping the Frame
Apply hot glue to a small section of the backing around the mirror. Press the rope carefully into place, working in short sections. Continue around the mirror until the exposed backing is covered.
5.) Add More Layers
For a fuller appearance, continue attaching additional rings of rope around the first layer. Keep each row close together and evenly aligned. Press the rope gently into the adhesive so the finished frame looks neat.
6.) Finish the Edges
Trim the remaining rope and secure the end carefully at the back or along a discreet section of the frame. Check for loose sections and add adhesive where necessary. Allow everything to cool and set completely.
7.) Add the Hanging Hardware
Attach suitable hanging hardware to the backing or frame. Make sure it can safely support the finished mirror. Choose wall anchors appropriate for your wall material and the mirror's weight.
8.) Display Your New Wall Decor
Hang your finished mirror above an entryway table, bedroom dresser, or living room console. Pair it with a ceramic vase, dried flowers, natural wood accessories, or warm lighting to complete the look.
Designer Tip
Use thicker natural jute rope for a bold, rustic frame, or thinner cotton rope for a softer and more refined appearance. You can also add a second rope color to create subtle contrast.
For a coordinated interior, make two smaller rope-framed mirrors and display them alongside framed artwork or woven wall decorations.
This project is a simple way to turn an ordinary mirror into a decorative statement piece without spending a lot on store-bought wall accessories.
Safety Note: Hot glue can cause burns, so handle the glue gun carefully. If using a frameless mirror, make sure the backing and hanging hardware are strong enough to support its weight. Never rely on decorative rope or cardboard alone to hold a heavy mirror.
Send to a friend
Make someone's day with a card, a note or a quick message.
Send to a friend
Make someone's day with a card, a note or a quick message.
Send this to a friend
Make their day with a beautiful card and a note from you.