BEST OFTefé
Amazonas, Brazil
The best places to eat, drink, shop and explore, chosen by real people like you.
Community in Tefé
Ask the people who know Tefé, and join what everyone is talking about.
Audience:
In Tefé
Global
All of CommunitiesWhat people everywhere are asking, sharing and debating.
Home & DIYGuideRein1h ago
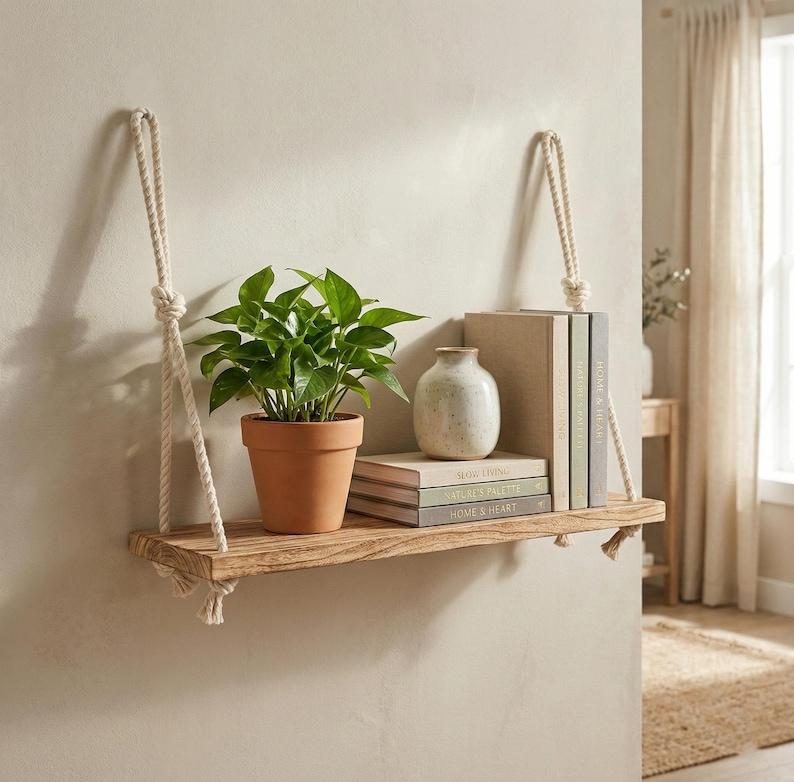
Create A DIY Hanging Rope ShelfDiy wooden rope hanging shelf Add a natural decorative touch to your home with a hanging wooden shelf. This project combines a wooden board and decorative rope to create a stylish display for lightweight plants, small decorations, or framed photographs. Materials • 1 sturdy wooden board • 2 lengths of strong decorative rope • 4 suitable eye bolts or rope openings with properly finished edges • Sandpaper • Wood stain or clear varnish • Suitable wall hooks or ceiling anchors • Optional: small decorative beads Tools • Drill with an appropriate bit • Measuring tape • Pencil • Paintbrush • Safety glasses Step-by-step instructions 1. Prepare the wooden board. Choose a sturdy board and sand all surfaces and edges until smooth. 2. Mark the holes. Measure equal distances from the board’s corners. Mark four positions, leaving enough space from the edges to prevent splitting. 3. Drill the holes. Carefully drill through the marked positions using a bit suitable for the rope diameter. Remove rough edges with sandpaper. 4. Finish the wood. Apply wood stain or clear varnish. Allow it to dry completely. 5. Thread the rope. Pass the rope through the holes and tie secure knots underneath the board. Adjust the rope lengths so the shelf hangs evenly. 6. Install the hanging support. Attach suitable hooks or anchors to a structural support capable of carrying the intended load. Do not rely on ordinary adhesive hooks. 7. Level the shelf. Hang the shelf and adjust the rope until the board sits horizontally. 8. Decorate your shelf. Add lightweight decorative objects, small artificial plants, or framed photographs. Estimated project time: 1–2 hours, excluding drying time. Design tip: Pair natural wood with beige or jute-colored rope for a warm, Scandinavian-inspired look. Important: A hanging shelf can fall if its rope, knots, board, or mounting points fail. Use load-rated hardware, secure structural supports, and test the installation carefully before adding anything. Keep it away from areas above beds, seating, or walkways.
Style & BeautyGuideRein1h ago
Create A DIY Hanging Rope ShelfDiy wooden rope hanging shelf Add a natural decorative touch to your home with a hanging wooden shelf. This project combines a wooden board and decorative rope to create a stylish display for lightweight plants, small decorations, or framed photographs. Materials • 1 sturdy wooden board • 2 lengths of strong decorative rope • 4 suitable eye bolts or rope openings with properly finished edges • Sandpaper • Wood stain or clear varnish • Suitable wall hooks or ceiling anchors • Optional: small decorative beads Tools • Drill with an appropriate bit • Measuring tape • Pencil • Paintbrush • Safety glasses Step-by-step instructions 1. Prepare the wooden board. Choose a sturdy board and sand all surfaces and edges until smooth. 2. Mark the holes. Measure equal distances from the board’s corners. Mark four positions, leaving enough space from the edges to prevent splitting. 3. Drill the holes. Carefully drill through the marked positions using a bit suitable for the rope diameter. Remove rough edges with sandpaper. 4. Finish the wood. Apply wood stain or clear varnish. Allow it to dry completely. 5. Thread the rope. Pass the rope through the holes and tie secure knots underneath the board. Adjust the rope lengths so the shelf hangs evenly. 6. Install the hanging support. Attach suitable hooks or anchors to a structural support capable of carrying the intended load. Do not rely on ordinary adhesive hooks. 7. Level the shelf. Hang the shelf and adjust the rope until the board sits horizontally. 8. Decorate your shelf. Add lightweight decorative objects, small artificial plants, or framed photographs. Estimated project time: 1–2 hours, excluding drying time. Design tip: Pair natural wood with beige or jute-colored rope for a warm, Scandinavian-inspired look. Important: A hanging shelf can fall if its rope, knots, board, or mounting points fail. Use load-rated hardware, secure structural supports, and test the installation carefully before adding anything. Keep it away from areas above beds, seating, or walkways.
Home & DIYGuideRein2h ago
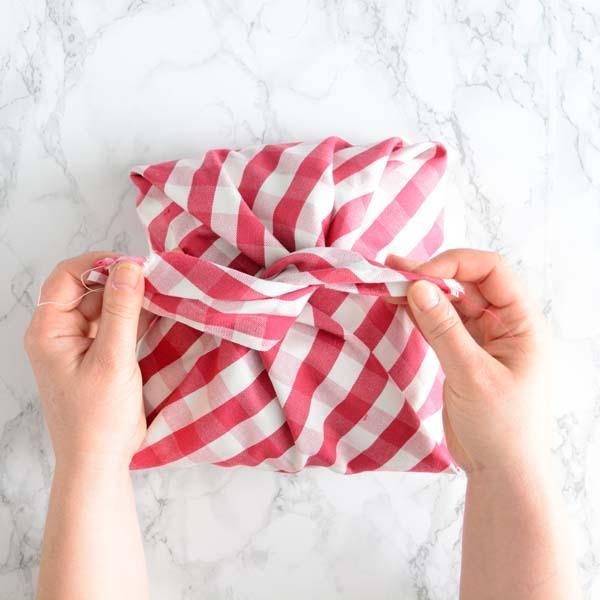
Make A No-Sew Cushion CoverDiy no-sew cushion cover Want to refresh your sofa or bedroom without buying new pillows? Make your own cushion covers using inexpensive fabric and a simple folding technique. No sewing machine is required. Materials • Fabric large enough to wrap around your cushion • Existing cushion insert • Fabric scissors • Measuring tape • Fabric chalk or washable marker • Iron, optional Step-by-step instructions 1. Measure your cushion. Measure its width and height. Choose a fabric piece large enough to wrap around the cushion with extra material for overlapping and securing the back. 2. Prepare the fabric. Wash and iron it if needed. Place it flat on a clean surface with the decorative side facing down. 3. Position the cushion. Place your cushion in the center of the fabric. 4. Fold the fabric. Bring the top and bottom edges over the cushion. Fold the raw edges inward to create a cleaner finish. 5. Secure the sides. Fold the remaining side flaps over one another behind the cushion. Tie the fabric ends together securely or use fabric-safe fastening tape to hold the overlap in place. 6. Adjust the shape. Turn the cushion over and arrange the fabric so the front looks smooth and the folds are hidden. 7. Style your space. Combine different fabric colors and textures to create a coordinated sofa or bedroom look. Estimated project time: 20–40 minutes. Design tip: Choose linen-look fabric, cotton, or textured neutral materials for a cozy and sophisticated appearance. Important: This is a decorative cover, not a permanently secured sewn cover. Check the fastening before use, especially around children and pets. Avoid loose ties that could become entanglement hazards.
Home & DIYGuideRein2h ago
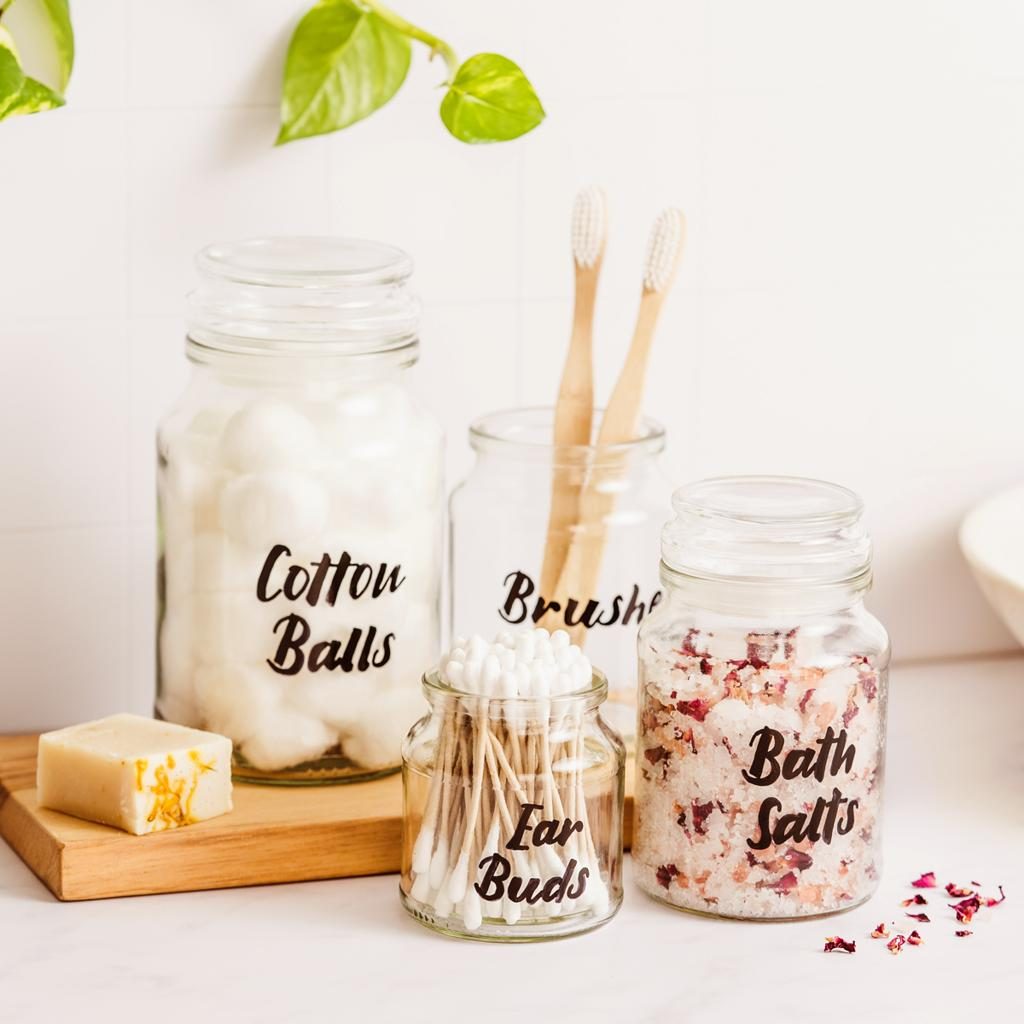
Turn Empty Jars Into Aesthetic Storage ContainersDiy aesthetic glass jar organizers Give empty glass jars a second life by turning them into beautiful storage containers. This simple project is perfect for organizing kitchen ingredients, cotton pads, makeup brushes, stationery, and other small household essentials. Materials • 3–5 clean, empty glass jars • Acrylic paint or spray paint • Decorative labels or sticker paper • Paintbrush • Rubbing alcohol • Optional: twine, ribbon, or wooden lids Step-by-step instructions 1. Clean the jars. Remove the original labels and adhesive. Wash the jars thoroughly, dry them, and wipe the outside with rubbing alcohol to remove remaining residue. 2. Choose your design. Decide whether you want a minimalist white finish, warm neutral colors, or a transparent glass look. 3. Paint the lids. Apply acrylic paint or suitable spray paint to the lids. Allow each coat to dry before adding another. 4. Create your labels. Write the contents on sticker paper or print simple labels. Keep the lettering consistent for a coordinated appearance. 5. Decorate the jars. Add twine around the neck or attach small decorative details if desired. 6. Arrange and organize. Use the finished jars to store dry kitchen ingredients, bathroom accessories, or craft supplies. Estimated project time: 30–60 minutes, excluding drying time. Design tip: Use matching labels and neutral colors to create a coordinated, minimalist storage collection. Important: Keep painted surfaces and decorative materials away from areas that touch food. Use jars intended for food storage, and ensure they are completely clean and dry.
Style & BeautyGuideRein2h ago
Turn Empty Jars Into Aesthetic Storage ContainersDiy aesthetic glass jar organizers Give empty glass jars a second life by turning them into beautiful storage containers. This simple project is perfect for organizing kitchen ingredients, cotton pads, makeup brushes, stationery, and other small household essentials. Materials • 3–5 clean, empty glass jars • Acrylic paint or spray paint • Decorative labels or sticker paper • Paintbrush • Rubbing alcohol • Optional: twine, ribbon, or wooden lids Step-by-step instructions 1. Clean the jars. Remove the original labels and adhesive. Wash the jars thoroughly, dry them, and wipe the outside with rubbing alcohol to remove remaining residue. 2. Choose your design. Decide whether you want a minimalist white finish, warm neutral colors, or a transparent glass look. 3. Paint the lids. Apply acrylic paint or suitable spray paint to the lids. Allow each coat to dry before adding another. 4. Create your labels. Write the contents on sticker paper or print simple labels. Keep the lettering consistent for a coordinated appearance. 5. Decorate the jars. Add twine around the neck or attach small decorative details if desired. 6. Arrange and organize. Use the finished jars to store dry kitchen ingredients, bathroom accessories, or craft supplies. Estimated project time: 30–60 minutes, excluding drying time. Design tip: Use matching labels and neutral colors to create a coordinated, minimalist storage collection. Important: Keep painted surfaces and decorative materials away from areas that touch food. Use jars intended for food storage, and ensure they are completely clean and dry.

Travel & PlacesFindRein2h ago
Lakes That Build Their Own WaterfallsHidden among the forests of Croatia is a remarkable landscape where lakes, waterfalls, and natural limestone barriers continuously shape one another. Plitvice Lakes National Park contains 16 named lakes connected by a series of waterfalls and cascading streams. Their brilliant colors range from turquoise and emerald green to deep blue, depending on the minerals, organisms, sunlight, and water conditions. What makes this place especially fascinating is how its lakes were formed. Water flowing over limestone and other mineral-rich rock deposits calcium carbonate, creating natural barriers known as tufa or travertine. Over thousands of years, these barriers have gradually developed into natural dams that hold back water and create new lakes and waterfalls. And the process has not stopped. These mineral formations continue to grow and change, meaning the landscape is constantly evolving. Visitors can explore wooden walkways, forest trails, viewpoints, and waterfalls while discovering one of Europe’s most extraordinary natural environments. Where: Plitvice Lakes National Park, Croatia. Worth knowing: The park is a UNESCO World Heritage Site. Visitors should stay on designated paths and avoid touching or disturbing the delicate natural barriers.