DIY Textured Abstract Canvas Wall Art

Create Your Own Expensive-Looking Wall Decor
What Is It?
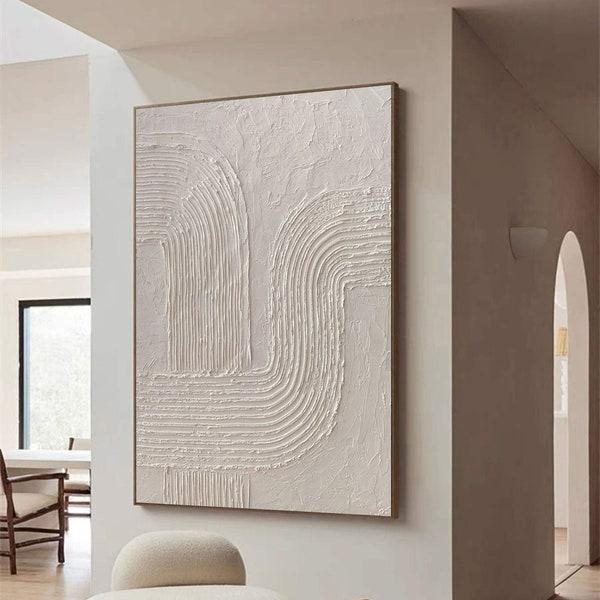
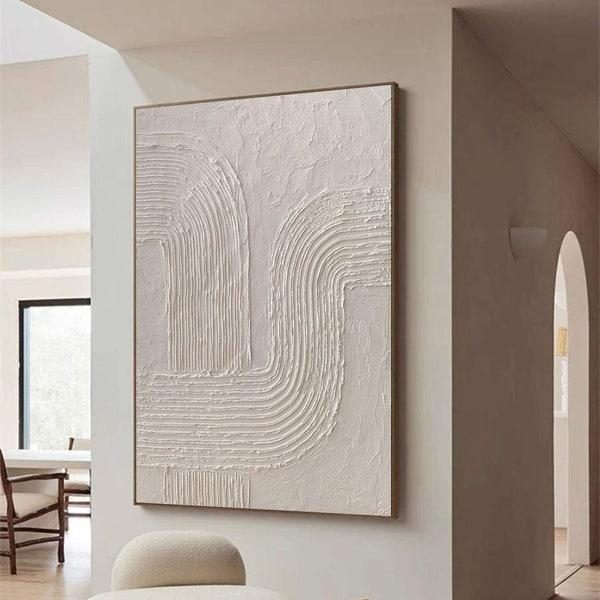
Textured abstract canvas art is a decorative piece made by applying a thick, spreadable material to a canvas to create raised patterns, curves, waves, and other three-dimensional details.
Unlike ordinary paintings that rely mainly on colors and brushstrokes, this design uses texture, light, and shadows to create visual interest. The raised patterns give the artwork depth, making it look similar to handmade plaster or sculptural wall art found in modern interior design stores.
The best part is that you do not need to know how to paint or draw. You can create your own design using simple tools such as a putty knife, palette knife, or even a piece of cardboard.
Choose warm white, cream, beige, taupe, or terracotta for a soft and natural appearance. You can also create a pair of matching canvases to make a larger statement on your living room or bedroom wall.
Materials You Will Need
- Blank stretched canvas or sturdy canvas panel
- Lightweight joint compound or acrylic modeling paste
- Putty knife or palette knife
- Small mixing container
- Mixing stick
- Acrylic paint in your preferred colors
- Paintbrush
- Notched cardboard or plastic comb for creating patterns
- Fine sandpaper for light finishing, if needed
- Drop cloth or old newspapers to protect your workspace
- Picture-hanging hardware
How to Make It
1.) Prepare Your Workspace
Cover your working surface with an old sheet, drop cloth, or newspaper. Place your canvas on a flat, stable surface. Make sure the canvas is clean and dry before applying any material.
2.) Choose Your Design
Decide what kind of texture you want to create. Beginners can start with simple curved lines, waves, arches, or repeated horizontal patterns. You can lightly sketch your preferred design on the canvas before applying the compound.
3.) Apply the Texture Material
Using a putty knife, spread a thin, even layer of joint compound or modeling paste over the canvas. Work in small sections so the material remains easy to shape. Avoid applying excessively thick layers because some compounds can crack as they dry.
4.) Create Your Patterns
While the material is still wet, use your palette knife to create curved strokes, flowing waves, or raised shapes. For a simple ribbed effect, gently drag a notched piece of cardboard across the surface. You can also use a spoon or small spatula to create rounded patterns.
5.) Add More Details
Experiment with different directions and textures, but avoid overcrowding the design. A few large, flowing patterns can look more elegant than too many small details. Keep the surface balanced and leave some areas relatively smooth.
6.) Let It Dry Completely
Leave the canvas in a well-ventilated area and allow the material to dry according to the manufacturer's instructions. Drying time depends on the product, thickness, and room conditions. Do not paint over damp material.
7.) Paint Your Artwork
Once completely dry, apply your chosen acrylic paint. For a minimalist look, use one warm neutral color across the entire canvas. You can also lightly brush a second shade over the raised areas to emphasize the texture.
8.) Display Your Finished Piece
Let the paint dry before adding hanging hardware. Place your artwork above a sofa, bedroom headboard, entryway console, or dining area. A simple wooden frame can give it an even more polished appearance.
Designer Tip
For a modern organic look, try a warm ivory or creamy beige finish with large, flowing curved patterns. Pair it with natural wood furniture, linen fabrics, ceramic accessories, and warm lighting.
You can also create two canvases with complementary patterns and hang them side by side. This creates the appearance of a coordinated designer art set without needing to purchase expensive wall decor.
The beauty of this project is that every piece will be different. You are not simply decorating a canvas. You are creating a custom artwork that reflects your own style.
Send to a friend
Make someone's day with a card, a note or a quick message.
Send to a friend
Make someone's day with a card, a note or a quick message.
Send this to a friend
Make their day with a beautiful card and a note from you.