Make A Supportive Desk Footrest

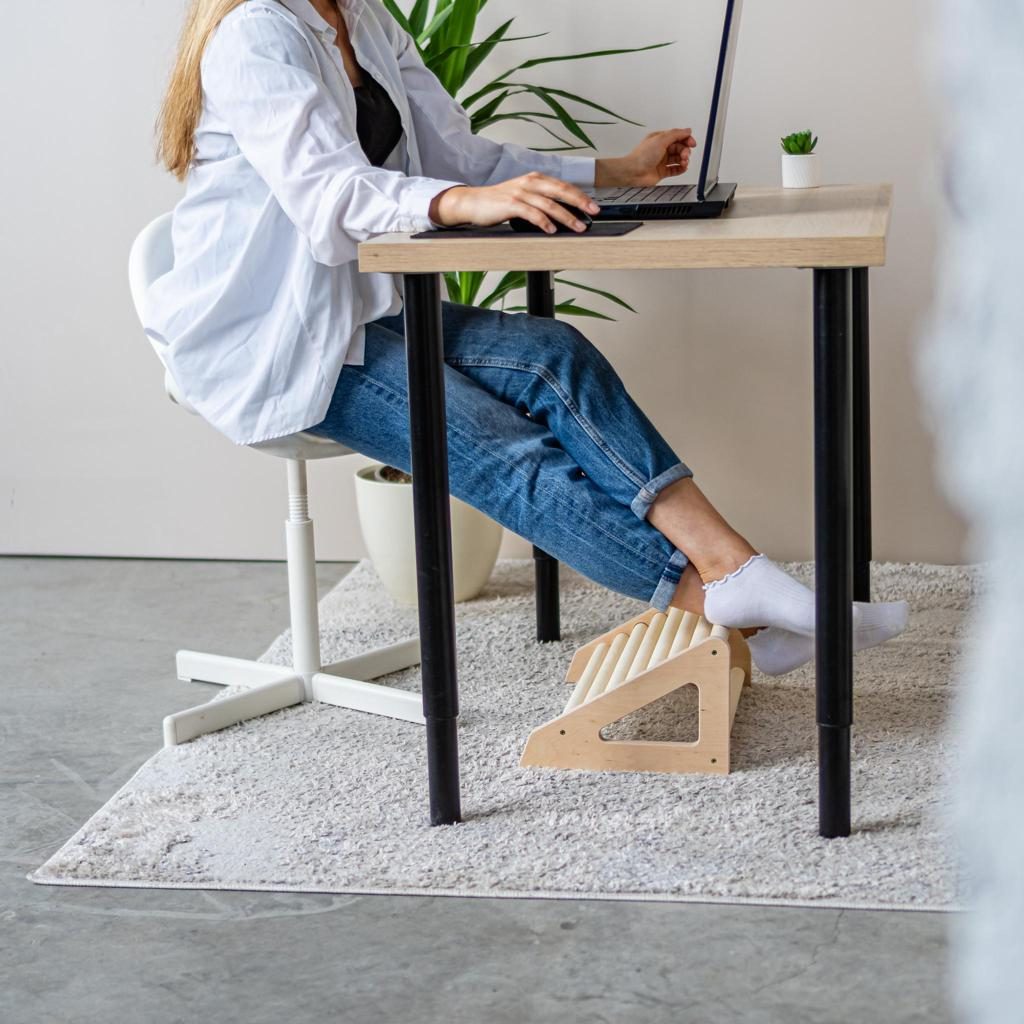
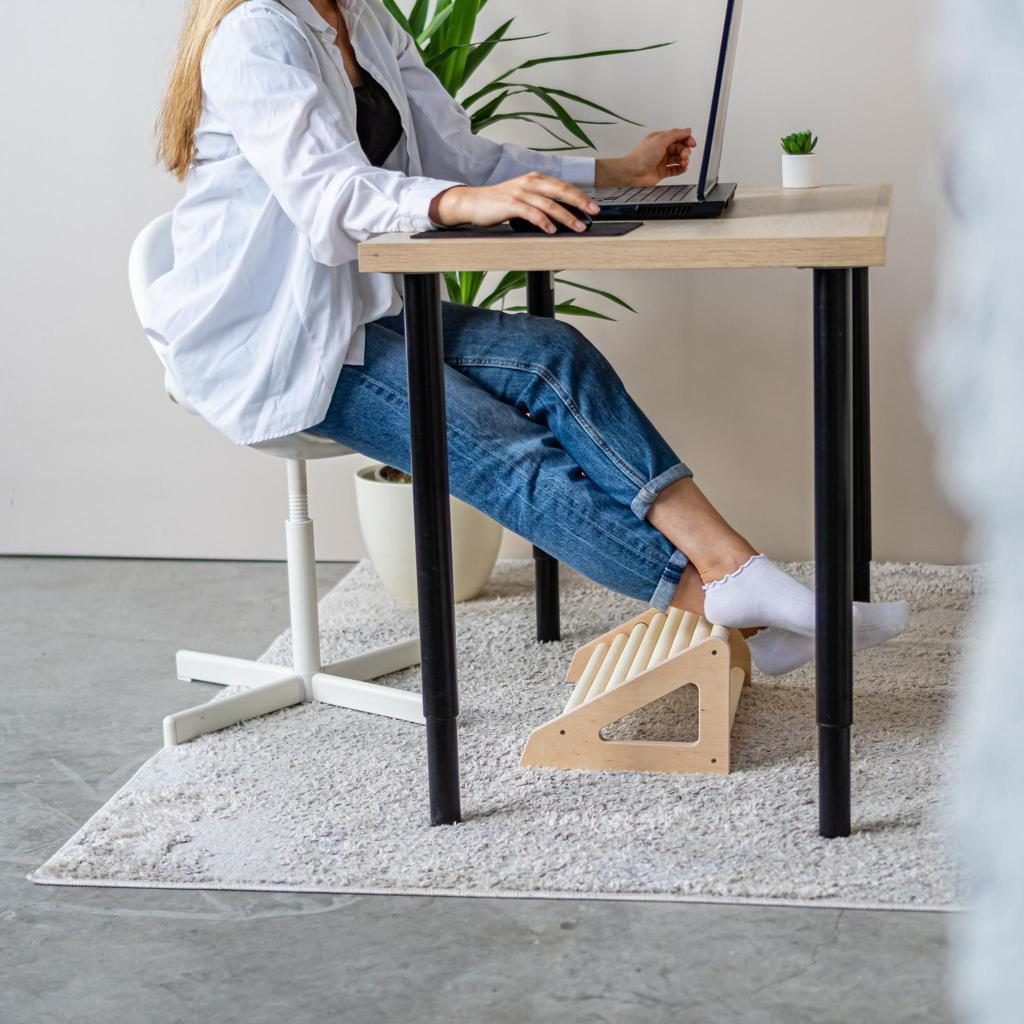
YOUR FEET DESERVE PROPER SUPPORT TOO.
A long workday can become uncomfortable when your feet cannot rest flat on the floor. A simple wooden footrest gives your feet a stable surface and can help you maintain a more comfortable sitting position.
This project is especially useful if your chair is slightly too high for your desk or your feet feel unsupported while working.
WHAT YOU'LL NEED
- One sturdy wooden board for the top
- Two wooden side supports
- Wooden slats or additional boards for the platform
- Wood glue
- Wood screws or suitable construction adhesive
- Sandpaper
- Measuring tape and pencil
- Saw and drill, if using screws
- Non-slip rubber pads
- Wood stain or clear protective coating
STEP-BY-STEP INSTRUCTIONS
- Check your sitting position
Sit in your usual work chair and place both feet on the floor. If they cannot rest comfortably and your thighs are being pressed by the chair edge, a footrest may help.
Measure the available space underneath your desk. Your footrest should fit without hitting the desk legs or restricting your movement.
- Measure the platform
Measure a comfortable width for both feet and enough depth to let you shift your feet naturally. A platform around 12 to 14 inches deep can be a useful starting point, but adjust it to your own space.
- Prepare the side supports
Cut two matching wooden supports. For a gently angled design, mark the desired slope on both pieces before cutting. Keep the supports identical so the finished footrest sits evenly.
- Cut the top boards
Prepare the wooden slats or one solid platform panel. If you use separate slats, make sure they are equal in length and sand their edges.
- Assemble the platform
Place the top boards across the two side supports. Keep the spacing even if you are using slats. Apply wood glue to the contact points, then secure the pieces with screws or a suitable construction adhesive.
If using adhesive, follow the manufacturer's instructions and allow the full curing time before putting weight on the footrest.
- Check the angle and stability
Place the footrest on a level floor. Press gently on different areas of the platform to check for rocking or movement. Reinforce any loose joints before use.
- Smooth and seal the wood
Sand the top and edges until smooth. Apply a clear protective coating or wood finish to make the surface easier to clean. Let it dry fully.
- Add non-slip pads
Attach rubber pads underneath the supports. This helps prevent the footrest from sliding across smooth flooring.
DESIGNER TIP
A slatted top gives the footrest a light, modern appearance. If you prefer a softer surface, add a thin removable cushion with a non-slip backing.
IMPORTANT
The footrest should support your feet comfortably, not force your knees too high. Keep your feet supported and your knees and hips in a comfortable position. This is a comfort accessory, not a substitute for adjusting your chair and desk properly.
Would you add this to your work-from-home setup?
Save this practical DIY for a more comfortable desk.
Send to a friend
Make someone's day with a card, a note or a quick message.
Send to a friend
Make someone's day with a card, a note or a quick message.
Send this to a friend
Make their day with a beautiful card and a note from you.